Homemade Twix Cookies: Your Ultimate Candy Bar Treat
There are few candy bars as iconic and universally loved as the Twix. With its distinctive combination of a crisp cookie base, rich, chewy caramel, and smooth milk chocolate coating, it’s a symphony of textures and flavors that has captivated taste buds for decades. But what if you could capture that magic, elevate it, and bring it right into your own kitchen? Enter the world of homemade Twix cookies – a delightful rendition that takes everything you adore about the classic candy bar and transforms it into an even more indulgent, satisfying cookie experience.
Imagine biting into a soft, buttery cookie, immediately met by a luscious layer of gooey caramel, all enrobed in a perfectly tempered chocolate shell. That's precisely what these Irresistible Twix Cookies: Shortbread, Caramel & Chocolate Layers offer. They're not just cookies; they're an homage to a confectionery legend, crafted with love and a touch of culinary creativity. Whether you're a seasoned baker or a curious novice, creating these delectable treats is an incredibly rewarding journey.
What Makes Homemade Twix Cookies So Irresistible?
The allure of Twix cookies lies in their layered complexity, mirroring the beloved candy bar while adding a personal, homemade touch. Each component plays a vital role in creating an unforgettable sensory experience:
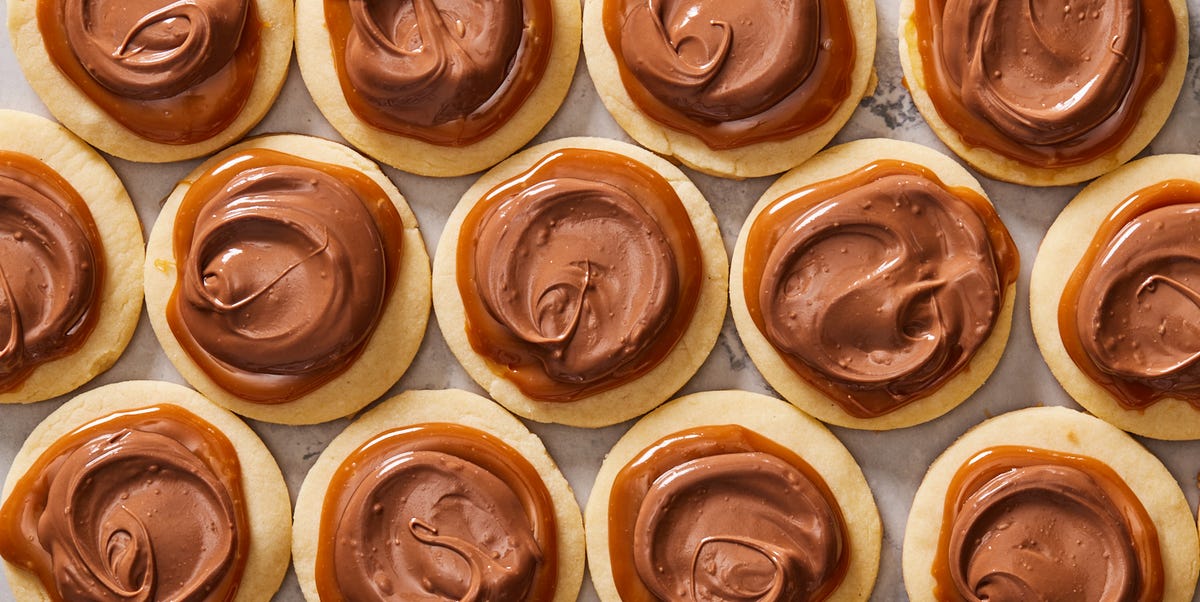
- The Buttery Cookie Base: Unlike some cookies that rely on a standard sugar cookie, the best Twix cookies often feature a tender, crumbly shortbread base. This shortbread provides a subtle richness and a delicate snap that perfectly contrasts with the softer layers to come. It's the sturdy foundation that holds everything together, ensuring each bite is structurally sound and bursting with flavor.
- The Gooey Caramel Layer: This is where the magic truly happens. A generous layer of soft, chewy caramel provides that signature sweet, sticky decadence that Twix lovers crave. The caramel's warmth and pliability create an enticing textural contrast against the cookie, making every mouthful an adventure.
- The Smooth Chocolate Topping: No Twix cookie would be complete without its signature chocolate coating. A glistening layer of melted milk chocolate (or your preferred variety) not only seals in the caramel but also adds a final touch of sweetness and a satisfyingly crisp finish. It’s the perfect capstone to this delicious edible architecture.
Together, these three elements create a symphony of taste and texture that is both familiar and excitingly new. The combination of crumbly, chewy, and smooth makes these cookies utterly addictive and an absolute showstopper for any gathering.
Crafting Your Own Twix Cookies: A Step-by-Step Guide
While the result is undeniably impressive, making homemade Twix cookies is surprisingly straightforward. This process breaks down into three main stages: preparing the cookie base, layering the caramel, and applying the chocolate coating. Here's a detailed guide to help you recreate this classic candy bar in cookie form.
Ingredients You'll Need:
Gathering your ingredients beforehand makes the baking process smoother:
- For the Buttery Shortbread Base:
- 1 cup (2 sticks) unsalted butter, softened
- ½ cup powdered sugar
- 1 teaspoon vanilla extract
- 2 cups all-purpose flour
- ¼ teaspoon salt
- For the Gooey Caramel Layer:
- 1 cup soft caramel candies (approximately 25-30 individual wrapped caramels), unwrapped
- 2 tablespoons heavy cream
- For the Smooth Chocolate Topping:
- 2 cups milk chocolate chips (or desired chocolate, e.g., semi-sweet, dark)
- 1 teaspoon vegetable oil (or coconut oil)
Instructions:
- Prepare Your Workspace: Preheat your oven to 350°F (175°C). Line one or two baking sheets with parchment paper to prevent sticking and ensure easy cleanup.
- Master the Shortbread Dough: In a large mixing bowl, using an electric mixer, cream together the softened butter and powdered sugar until the mixture is light, fluffy, and pale yellow. This can take 2-3 minutes. Beat in the vanilla extract until well combined. Gradually add the flour and salt, mixing on low speed until a soft, cohesive dough forms. Be careful not to overmix, as this can make the shortbread tough.
- Shape and Bake the Cookies: Lightly flour a clean surface. Turn out the dough and roll it evenly to about ¼-inch thickness. Using a round cookie cutter (about 2-2.5 inches in diameter), cut out your cookies and carefully transfer them to the prepared baking sheets. Bake for 12-15 minutes, or until the edges are lightly golden. The centers should still be soft.
- Cool Completely: Allow the baked shortbread cookies to cool on the baking sheets for a few minutes before transferring them to a wire rack to cool completely. This step is crucial; warm cookies will melt the caramel.
- Create the Caramel Layer: In a microwave-safe bowl, combine the unwrapped caramel candies and heavy cream. Microwave in 30-second intervals, stirring thoroughly after each interval, until the caramel is completely melted and smooth. This typically takes 1-2 minutes. Alternatively, you can melt the caramel in a double boiler for a gentler heat.
- Caramelize Your Cookies: Once the shortbread cookies are fully cooled, spread a generous layer of the warm, melted caramel over the top of each cookie. Use an offset spatula or the back of a spoon for an even coating.
- Set the Caramel: Place the caramel-coated cookies in the refrigerator for about 15-20 minutes. This allows the caramel to firm up, making the next step much easier.
- Melt the Chocolate Topping: While the caramel is setting, melt your chocolate. In another microwave-safe bowl, combine the milk chocolate chips and vegetable oil. Microwave in 30-second intervals, stirring well after each, until the chocolate is smooth and glossy. The oil helps to thin the chocolate slightly, making it easier to dip and giving it a beautiful sheen.
- Dip and Finish: Take the cookies out of the refrigerator. Dip the top of each caramel-coated cookie into the melted chocolate, ensuring full coverage. Allow any excess chocolate to drip off before carefully placing the cookies back onto the parchment-lined baking sheet.
- Final Chill: Refrigerate the cookies one last time for another 15-20 minutes, or until the chocolate has fully set and hardened.
And just like that, you've created a batch of glorious homemade Twix cookies, ready to be devoured!
Tips for Perfecting Your Twix Cookies
To truly elevate your Twix cookies from great to extraordinary, consider these expert tips and insights:
- Quality Ingredients Matter: Since there are only a few key components, using high-quality butter, vanilla extract, and chocolate will make a noticeable difference in the final taste.
- Don't Overmix the Shortbread: The secret to tender shortbread is minimal mixing once the flour is added. Overmixing develops gluten, leading to a tougher cookie.
- Even Thickness for Cookies: When rolling out your dough, aim for consistent ¼-inch thickness. This ensures all cookies bake evenly and have a similar texture.
- Control Caramel Temperature: When melting caramels, go slow. If the caramel gets too hot, it can become tough or crystallize. Low heat or short microwave bursts with plenty of stirring are key to a smooth, flowing caramel. If you’re short on time, a high-quality ready-made caramel sauce can also work in a pinch, though the texture might be slightly different.
- The Oil in Chocolate is Your Friend: Adding a teaspoon of vegetable or coconut oil to your melting chocolate isn't just for shine; it makes the chocolate more fluid and easier to work with, resulting in a thinner, more elegant coating.
- Patience with Setting Times: Rushing the cooling and setting stages for both the caramel and chocolate can lead to messy results. Allow each layer ample time to firm up before moving to the next step.
- Storage: Store your Twix cookies in an airtight container at room temperature for up to 3-4 days, or in the refrigerator for up to a week. If stacking, consider placing parchment paper between layers to prevent sticking.
- Get Creative with Variations: While milk chocolate is classic, feel free to experiment! Use dark chocolate for a richer flavor, white chocolate for a sweeter profile, or even sprinkle a pinch of sea salt on top of the wet chocolate for a delightful salty-sweet contrast.
Why Homemade is Always Best
In a world overflowing with store-bought treats, there's an unparalleled joy and satisfaction in creating something from scratch. Easy Twix Cookies: Recreate the Classic Candy Bar at Home offers numerous benefits beyond just a delicious dessert:
- Control Over Ingredients: You know exactly what goes into your cookies – no mysterious preservatives or artificial flavors. You can choose organic ingredients, adjust sweetness levels, or even cater to certain dietary preferences (e.g., using gluten-free flour for the shortbread).
- Superior Freshness and Flavor: Nothing beats the taste of freshly baked goods. The aroma alone is enough to make mouths water, and the vibrant flavors of homemade ingredients shine through in a way that mass-produced items simply can't match.
- The Joy of Creation: There's a profound sense of accomplishment in crafting something beautiful and delicious with your own hands. Baking is a therapeutic and creative outlet that results in a tangible, tasty reward.
- Perfect for Gifting: Homemade cookies make thoughtful and personal gifts for friends, family, or colleagues. A box of these stunning Twix cookies will be far more appreciated than any store-bought equivalent.
- Cost-Effective: Often, making treats at home can be more economical than purchasing premium baked goods or specialty candy bars, especially when you're making a larger batch.
So, why settle for an ordinary cookie when you can embark on an exciting culinary adventure to create your very own homemade Twix cookies? It’s an ultimate candy bar treat that combines the nostalgia of a classic with the warmth and quality of homemade goodness.
In conclusion, these homemade Twix cookies are more than just a dessert; they're an experience. They offer the perfect trifecta of a buttery shortbread base, luscious caramel, and a smooth chocolate topping, delivering all the beloved flavors of the iconic candy bar in an irresistible cookie format. Whether you're baking for a special occasion, a casual treat, or simply to satisfy a craving, this recipe promises to deliver delight with every single bite. Gather your ingredients, follow these steps, and prepare to impress everyone (including yourself!) with your ultimate candy bar creation.
